Raymarcher
The Raymarcher component renders your raymarched scene to all cameras (the exception being any cameras with a culling mask that excludes the layer the Raymarcher’s GameObject is on).

Properties
| Target Rendererer | This Raymarcher will render into the space defined by this renderer. Otherwise, if it's null, the Raymarcher will render "everywhere" as a fullscreen effect. |
| Draw Distance | How far to render out the raymarcher content. Acts like a separate far plane. |
| Resolution | A value from 0-1. A percentage of the actual resolution to render. |
| Steps | How many "steps" to take when raymarching a ray into the scene before giving up. Scenes of greater complexity may need more steps. |
| Extra accuracy | A value from 0-1. Scenes using modifiers that distort space may require increasing this value. Increases the cost of rendering each pixel. |
| Ambient Occlusion | If enabled, areas that are occluded by other areas get darkened. |
| Ambient Occlusion Amount | Controls how strong ambient occlusion darkens the scene. |
| Ambient Occlusion Steps | Controls how many steps the ambient occlusion algorithm uses to find out how occluded a point in space is. |
| Fog | Enable fog for raymarched pixels. |
| Fog Color | The color to fade fog to. |
| Fog Density | The higher this value, the closer the fog is to the camera. |
| Fade to Skybox | If true, pixels far away from the camera will fade into the skybox color. |
| Fade to Skybox Distance | Controls how far away to start fading into the skybox. |
| Auto Compile | If checked, a new shader will be generated anytime you rearrange Raymarcher objects in your scene. For bigger scenes, this may take a few seconds and be inconvenient, so you can uncheck it. A button to compile the shader manually will appear both at the top of the Raymarcher component, and in the bottom-right corner of the scene view. |
| Draw Scene View in Play Mode | If true, the raymarcher will still draw in scene view in Play mode. Usually this disabled for performance. |
| Scene View Resolution | Like the Resolution slider, but for the scene view. |
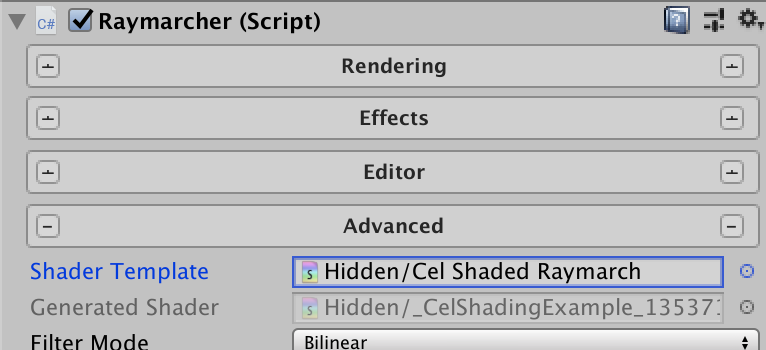
| Shader Template | Override the template used to generate your shaders. See Overriding the shader template below. Modify any part of the raymarching pipeline--lighting, the raymarching process itself, etc. |
| Generated Shader | Shows a link to this Raymarcher's generated shader. Double-click to open it in your editor. To change the path where it is generated, see RaymarchingPreferences. |
| Filter Mode | Point, Bilinear, or Trilinear. The filter mode to blit the raymarched content into your scene with. |
| Shader Function Names | Allows you to override functions used by the raymarching shader with your own implementations. |
Methods
| GetRaymarcherMaterial() | Returns the Material used to draw the raymarched scene. |
Scene view selection
You can click on raymarched objects in the Scene View to select them.
Two Modes: Fullscreen, or Render-as-object
Normally, a Raymarcher component in your scene will render all RaymarchObjects via a fullscreen pass on your camera. This means the objects can appear anywhere and at any size.
An alternative exists: to define an area in which to render a set of RaymarchObjects.If you set the TargetRenderer field to a Renderer component, it will render only in the bounds of that Renderer. Additionally, if you parent RaymarchObjects underneath the Raymarcher, it will render only in that Raymarcher. This effectively lets you have separate raymarched objects in your scene.
Overriding the shader template
To change the way the raymarching process works, or to modify the way objects or lit, or to do further customization, you can override the base shader template.
Duplicate and rename the file Raymarching Toolkit/Assets/Shaders/RaymarchTemplate.shader somewhere in your project, and then point your Raymarcher’s “Shader Template” field at it. It will then use the new file as the basis for generating your scene’s shader.
To achieve the cel-shaded effect, we copy the defaultRaymarch function from Raymarching Toolkit/Assets/Shaders/RaymarchingEntryPoints.cginc into our own template, rename it to celShadedRaymarch, and add the following in the middle:
// Here's a very primitive way to do celshading. First, we define a few values
// that our brightness gets clamped to:
const float A = 0.1;
const float B = 0.3;
const float C = 0.6;
const float D = 1.0;

// We convert our color to HSV (hue, saturation, value), and then clamp the value
// to one of those values, and convert back to RGB for rendering.
float3 hsv = RGBtoHSV(color);
if (hsv.z < A) hsv.z = 0.05;
else if (hsv.z < B) hsv.z = B;
else if (hsv.z < C) hsv.z = C;
else hsv.z = D;
color = HSVtoRGB(hsv);
We cel shade by converting to HSV and then clamping the V part.
(We also need the HSVtoRGB and RGBtoHSV functions–see the linked .unitypackage for implementations.)
Then all is left to do is to change the #define raymarch defaultRaymarch line to the name of our new function, like:
#define raymarch celShadedRaymarch
See the linked .unitypackage file for a working example!